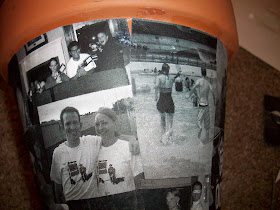
For June's enrichment craft night, we made a photo collage on a flower pot. Here are the directions.
You will need: a clay flower pot, Mod Podge, paint brush, paper cutter (optional), scissors, photos (copied or printed out on regular paper in black and white).
You will need: a clay flower pot, Mod Podge, paint brush, paper cutter (optional), scissors, photos (copied or printed out on regular paper in black and white).

1. Brush a layer of Mod Podge on the area you are going to apply a photo. Lay the photo over the glue and rub out all the bubbles (very important or you will get wrinkles). Continue until you have covered your entire pot with photos.

2. Use scraps to fill in any gaps you may have.

3. Apply a layer of Mod Podge over the entire surface. This gives the pot a nice, finished look.


Thanks for posting this Shauna, I am sad I couldn't make it though I had all the stuff :( but this is great- Thanks
ReplyDeleteSuper cut pot!! And cheap, I love it. Just a suggestion, some cute black and white polka dotted ribbon on the rim might be cute too! Just a thought though, love it the way it is!
ReplyDeleteNice work - once more!
ReplyDeleteLove the photos, too :)
LOVE - especially the use of Mod Podge!
ReplyDelete